Guide with all the necessary steps so that you can change the components of the Wiko View 3 Pro (W-P611) yourself.


We apply heat to the back shell, and with the help of a fine tool we will open a gap to introduce a plastic spike, and thus run less risk of scratching the case.


We extract the seven Phillips screws (PH # 00) that hold the intermediate casing, take off the flex of the NFC antenna, and with the help of a flat-tipped tool we unhook the intermediate casing.


We disconnected the battery to work with greater security.


We remove the tray from the cards, and disconnect all the cameras from the phone.


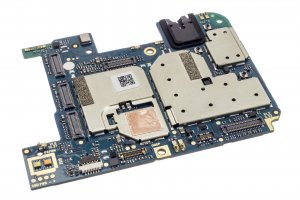
Disconnect the components that are connected to the base plate that we have to replace, and before lifting the plate completely, we will lift it a bit to disconnect the coaxial cable, and now we can remove the damaged plate.


