Guide with all the necessary steps so that you can change the Sony Xperia E headset yourself.


CHARACTERISTICS:
Before starting, make sure that the mobile is turned off.


Push the lid with your thumbs up.


Separate the back cover by pulling it.


Remove the battery by prying the bottom with an opening tool.


Remove the SIM and SD cards.


To separate the lower cover we must release the two plastic tabs that hold it.


Remove the 7 Torx screws that hold the housing.


With the help of a tine, disassemble the intermediate housing by releasing the plastic hooks all around.


Separate the intermediate housing.


Remove the adhesive that covers the connectors on the screen.


Take off and disconnect the flex from the digitizer, by activating the tab of the connector and gently pulling the flex.


Unplug and remove the rear camera.


Pull the coaxial cable to separate it from the chassis.
Separate the base plate by pulling on the top.


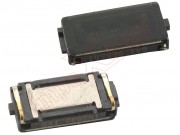
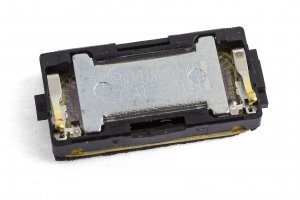
Finally, take off the handset with the help of the metal spatula.