Guide with all the necessary steps so that you can change the components of the Samsung Galaxy Z Flip3 5G (SM-F711B) yourself.


First of all, we must apply heat to the rear casings, in order to soften the adhesive that holds them.


We cut a hole with the help of a thin metal tool, and then we will insert a plastic pick as this will make it less likely to scratch the case. We will open it as if it were a book, and we must remove the shield that covers the battery connector, for this we must remove the two Phillips screws (PH # 00) that hold it.


We disconnected the secondary battery to work with greater safety.


We disconnect and remove the back cover with screen with the help of a flat-tipped tool.


Like the back cover with screen, we will introduce a thin metal tool to open a small hole, and thus insert a plastic prong with which it will be less likely to scratch the case.


We extract the two Phillips screws (PH # 00) that hold the shield that covers the battery connector.


We disconnected the main battery, for safety.


We extract the five Phillips screws (PH # 00) that hold the upper cover, and remove it.
This step would not be necessary to remove the battery.


We disconnect all the flexes that are above the battery.


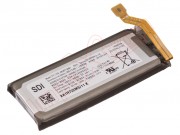
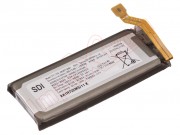
We inject a few drops of isopropyl alcohol into the side of the battery to soften the adhesive that holds it, and with the help of a thin and flat tool we will carefully remove the battery that we are going to change.