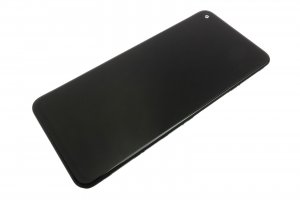
Oppo A72 - Fullscreen

Guides with all the steps necessary for you to repair the Oppo A72 (CPH2067) yourself.

Difficulty
1
2
3
4
5

Tutorial: Step by step

Step 1 Heat application

We start by applying heat to the back of the terminal and with the help of a fine tool we take off the battery cover around its entire contour until it is detached from its housing

Step 2 Camera lenses

Next, we peel off the adhesive that is on the camera lens and extract the eight Phillips type screws (PH # 00) and remove the camera lens from its housing.

Step 3 Intermediate housing

Next we disconnect the fingerprint reader connector and with the help of a Phillips-type screwdriver (PH # 00) we extract the five screws from the bottom of the terminal, then we remove the sim tray and with the help of a fine tool we extract the intermediate housing by all its contour

Step 4 We disconnect the battery

The next step will be to disconnect the battery with the help of a fine plastic tool to avoid incidents

Step 5 Components

In this step we will extract the upper protection casing by removing the only Phillips-type screw (PH # 00) that holds it in its housing.

Step 6 Connections

Then we release all the connections that rest on the motherboard once released, we will remove the motherboard from its housing

Step 7 Handset

Next we will remove the headset from its housing using a fine tool and detach the flex from its base to be able to remove it

Step 8 Power button

Next, we detach the flex of the power button from its base using a fine tool and detach the button from its housing until it is removed.

Step 9 Volume buttons

Here we will repeat the same process as the previous step but with the volume button located on the other side of the terminal.

Step 10 Speaker

We continue in the lower part of the terminal, removing the speaker, first we will extract the three Phillips type screws (PH # 00) and with the help of a fine tool we extract it from its housing.

Step 11 Auxiliary board

After removing the speaker, we will remove the auxiliary plate for this we will remove all the connections that are on it and we can extract it with the help of a fine tool

Step 12 Vibrator

Then with the help of a fine tool we will extract the vibrator by detaching it from its housing

Step 13 Battery

In this step we will remove the battery with the help of the removal adhesive that it brings, we will gradually pull it until we can lift the battery from its housing.

Step 14 Fullscreen

To finish we will remove the interconnection flex helping us with a fine tool once removed we will have the screen ready to change

Video Tutorial summary

In this video you can watch a quick summary of the tutorial, but we recommend to follow the complete tutorial, with its explanations and detailed images.
Share this tutorial