Guide with all the steps necessary for you to change the components of the Nokia 6.2 (TA-1198) yourself.


To start we remove the card reader with a SIM removal tool.


We will apply heat to the back shell with a thermal mat (about 75ºC for about 5-7 min approx) to soften the adhesive that holds it, and with the help of a tool thin enough we will make a hole to insert one or more plastic spikes and This way we will not risk damaging the case.


We remove the two Phillips screws (PH # 00) that hold the shield, remove it, then disconnect the connector from the fingerprint reader and remove the rear cover along with the reader.


We remove the sixteen Phillips screws (PH # 00) that hold the intermediate casing and with the help of a fine plastic tool we unhook it and remove it.
Carefully remove the intermediate housing as the NFC Antenna is attached to an adhesive that is attached to the motherboard.


We disconnect the battery to work with greater security.


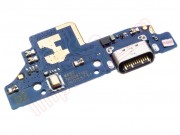
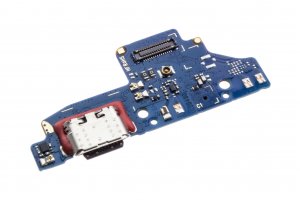
Next we remove the plastic cover as indicated in the first image, disconnect the coaxial cable and the interconnection flex and remove the auxiliary plate that comes attached to the speaker.


Finally, we remove the Phillips screw (PH # 00) that holds the auxiliary plate to the speaker, remove it and we would have the speaker module ready to replace.