LG Nexus 5X - Vibrator

Guide with all the steps necessary for you to change the LG Nexus 5X vibrator yourself (LG-H791).

Difficulty
1
2
3
4
5

Tutorial: Step by step

Step 1 Remove tray

Characteristics:
Dimensions: 72.6 x 147 x 7.9 mm.
Weight: 136 g.
SoC: Qualcomm Snapdragon 808 MSM8992.
Processor: 2x 1.8 GHz ARM Cortex-A57, 4x 1.44 GHz ARM Cortex-A53.
Graphic processor: Qualcomm Adreno 418, 600 MHz.
RAM memory: 2 GB, 933 MHz.
Internal memory: 16 GB, 32 GB.
Display: 5.2 in, IPS, 1080 x 1920 pixels, 24 bit.
Battery: 2700 mAh, Li-Polymer (polymer lithium ion).
Operating system: Android 6.0 Marshmallow.
Camera: 4032 x 3024 pixels, 3840 x 2160 pixels, 30 fps.
SIM card: Nano-SIM.
Wi-Fi: a, b, g, n, n 5GHz, ac, Dual band, Wi-Fi Hotspot, Wi-Fi Direct.
USB: 2.0, USB Type-C.
Bluetooth: 4.2.
Location / Navigation: GPS, A-GPS, GLONASS.

We will start by removing the tray from the SIM card to avoid damaging the equipment when removing the intermediate case.

Step 2 Remove back cover

We will remove the back cover, with the help of an opening tool we will unhook the notches that hold it.

Step 3 Remove intermediate housing

We remove the intermediate casing in two parts. We remove the ten Phillips screws (PH # 00) that hold it and then disengage the bottom, which is the antenna module and speaker.

Step 4 Remove intermediate housing

Now, to remove the upper part of the intermediate housing, we will release the notches that hold it with the help of the opening tool.

Step 5 Removing the motherboard

In order to remove the motherboard we will first have to disconnect the components connected to it. We will disconnect the flex from the screen, the battery and the cameras. We will take care, at the time of removing the plate, separating the flex cables so that they do not get caught.

Step 6 Vibrator

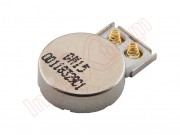
All that remains is to take off the vibrator from the phone's chassis.

Video Tutorial summary

In this video you can watch a quick summary of the tutorial, but we recommend to follow the complete tutorial, with its explanations and detailed images.
Share this tutorial