Guide with all the necessary steps for you to change the components of the LG G8s ThinQ (LM-G810EAW) yourself.


We apply heat to the housing to soften the adhesive that holds it, and with the help of a plastic opening tool we will take off all the edges of the housing.


We remove the adhesive that is left by the edges of the housing, remove the eight Phillips screws (PH # 00) that hold the housing and with the help of a flat tool we will unhook it.


We disconnect the battery to work with greater security.


We remove the tray from the cards.


We disconnect all the components that are connected on the motherboard.


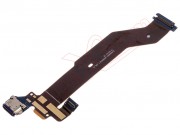
We lift the motherboard with the rear cameras connected, and we must disconnect the flex from the charging connector that is connected at the bottom of the motherboard.


We take off the battery with the help of a flat tool, which we can moisten with a little alcohol to soften the adhesive that holds it.


Remove the six Phillips screws (PH # 00) that hold the speaker module, and with the help of a tool we will unhook it.


We disconnect the components that are connected on the auxiliary board, and take it off.


To finish we will take off with a flat tool, we will take off the flex with the plate and the charging connector that we are going to replace.