Guide with all the necessary steps for you to change the components of the Huawei Y6s (JAT-L41) yourself.


To start we remove the card reader with an extraction tool.


To remove the back cover we open a small hole with an opening tool and carefully unhook all the edges.


With the help of an antistatic clamp, we remove the adhesive that protects the connector, lift the tab of the connector and remove the flex from the fingerprint reader.


We remove the three Phillips screws (PH # 00) that hold the shield and thus be able to disconnect the battery to work more safely.


We disconnect and extract the flex from the fingerprint reader.


We remove the four Phillips screws (PH # 00) that hold the cover and remove it.


We disconnect the rear camera and extract it.


We disconnect and extract the front camera.


With a fine plastic tool we pry, take off and remove the earpiece.


We lift the connector tab of the push button flex and extract it.
We disconnect the coaxial cable, the interconnection flex and the flex from the screen.


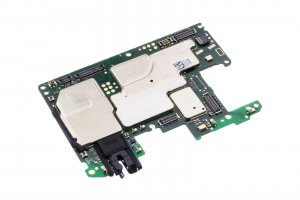
Finally, we remove the two Phillips screws (PH # 00) that hold the motherboard to the display chassis and with the help of a fine plastic tool we unhook it and remove it.


