Guide with all the necessary steps for you to change the components of the Google Pixel 3a XL (G020B) yourself.


We apply heat to the screen to soften the adhesive that holds it, and with the help of a tool and / or plastic spikes we will take off all the edges of the screen.


We remove the adhesive that is above the shield, we remove the two Torx screws (T4) that hold the shield, and we can disconnect the flex from the screen.


We remove the sixteen Torx screws (T4) that hold the phone's chassis, and take off the proximity sensor before unhooking the chassis.


We disconnect the battery to work with greater security.


We disconnect the interconnection flex to work comfortably.


We disconnect the pressure sensors, the interconnection flex and the fingerprint reader connector.


We disconnect and remove all the components that are connected to the motherboard.


We take off the battery taking care not to damage it.


We remove the tray from the cards.


We unhook the lateral support.


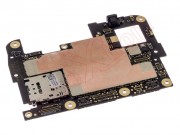
Remove the Torx screw (T4) that holds the motherboard, and disconnect the two coaxial cables from the rear.


Finally we will disconnect and take off the front camera of the motherboard that we are going to change.