Guide with all the necessary steps for you to change the components of the iPhone SE 2020 (A2296) yourself.


To start we will remove the two Pentalobe 0.8 screws (TS1), and using a suction cup and a fine tool we will lift the screen.


We remove the four Phillips screws (PH # 00) that hold the shield that we indicated in the first photo of this step, remove the shield, and with the help of a flat tool we will disconnect the battery to work with greater security.


We remove the four Phillips screws (PH # 00) that hold the upper shield, and with the help of a flat tip tool we will disconnect the components that connect the screen to the motherboard.


We remove the three Phillips screws (PH # 00) that hold the shield.


We extract the three Phillips screws (PH # 00) that hold the earpiece, and we will remove it with the help of tweezers.


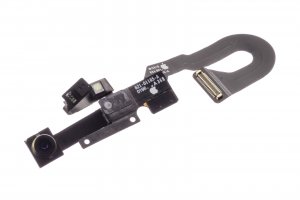
We remove the screw that holds the module and with the help of tweezers we will take it off.


