Guide with all the steps necessary for you to change the side keys of the iPhone 6s Plus yourself.


Before you start, make sure your mobile is turned off.


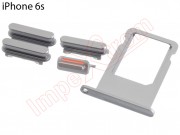
Remove the SIM tray using the removal tool.


Remove the 2 Pentalobe screws.


The front panel has double-sided adhesive on the contour to ensure tightness.
We will use a suction cup and while we pull the screen, we review the contour with the metal opening tool.


Lift the front panel from the bottom, since the data flexes are connected at the top.


Remove the metal shield covering the connectors, held by 5 Phillips screws.


Disconnect the data flexes from the front panel to separate it.
The following steps explain how to separate the battery and the motherboard. Depending on the keys you need to replace, you must separate only one of the two. If you need the keys on the right side, remove the battery. If you need the left side the base plate. If you need to replace all, continue with all the following steps.


Remove the shield from the lower connectors, secured by 2 Phillips screws.


Disconnect the battery connectors, lower flex and the upper end of the coaxial cable.


Remove the shield from the connector located just above the battery, held by 2 Phillips screws.
Disconnect the flex.


Remove the rear camera bracket, secured by 2 Phillips screws.
Unplug the rear camera and pull gently to remove it.


Disconnect the coaxial cables from the top of the motherboard.
Disconnect the flex from the power button, microphone and flash.


Remove the Phillips screws that hold the motherboard.
The one marked in red can be removed with a flat screwdriver.


The battery is glued with 3 strips of double-sided adhesive. Part of these adhesives protrudes from the bottom to pull them laterally and remove the adhesive in one piece.
If the adhesive breaks, which is most likely, you can detach it as shown in the next step.


With the wide part of a double opening tool we leverage, little by little, take off the battery.


Unhook the coaxial cable from the side of the plate, held by metal anchors.
Disconnect the flat coaxial cable from the underside of the motherboard.


Remove the upper antenna, held by 2 Phillips screws.


Remove the screws from the side supports, where the side buttons are located.


Pull the metal support back with the push buttons.
You can now extract the keys on the right side.


Repeat the process with the keys on the left side.