Guide with all the necessary steps for you to change the components of the Microsoft Surface Book 2 (PGV-00017) yourself.


We apply heat to the edges of the screen with a hot air gun, and with the help of as many spikes as necessary we will take off the screen.


We unhook the two shields of the photographs, and disconnect the two flexes that join the screen and the motherboard.


Remove the eleven Torx screws (T4) that hold the upper shield.


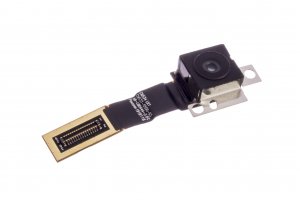
We remove the two Torx screws (T4) that hold the rear camera, and using a flat-tip tool we can disconnect and remove it to replace it.


