Guide with all the necessary steps so that you can change the Lenovo Yoga 2 tablet battery yourself.


Before starting, make sure the tablet is off.


Remove the SD card by opening the lid behind the holder.


Remove the 3 Phillips screws that hold the back cover. Note that you must remove the sticker that hides the 2 screws on the right.


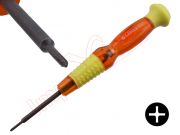
To separate the back cover we recommend the opening tool type "cortapizzas".


The curved parts on both sides of the support tend to resist a bit. Use the flat end of the black opening tool to gently pry it off.


Unplug the flex from the camera on the motherboard and pull gently to detach it.


Unplug the data flex from the touch screen, by pulling on the connector tab and gently pulling.


Unplug the flex located on the left side of the tablet, including the battery.


Disconnect the interconnection flex with the auxiliary plate.
Disconnect the data flex from the display.


Remove the 6 screws that hold the motherboard and turn it over to the motherboard.


Disconnect the antenna coaxial cables on the motherboard.


Remove the 4 Phillips screws and undo the module by prying it gently with the opening tool.


Unlock the rear support, prying gently.


Remove the metal shaft so as not to lose it.
Under 2 silver stickers we find 2 Phillips screws. Remove them to remove the plastic caps.


Remove the black cap without damaging the flex.
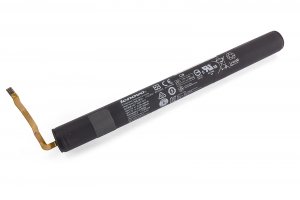
Finally, remove the cylindrical battery characteristic of this model.