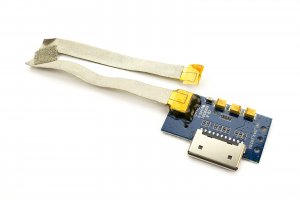
Engel Tab 10 Quad Retina - 3G expansion module

Guide with all the necessary steps so that you can change the 3G expansion module of the Engel Tab 10 Quad Retina yourself.

Difficulty
1
2
3
4
5

Tutorial: Step by step

Step 1 3G expansion module

Before starting make sure that the tablet is turned off.

Remove the cover of the 3G module and remove the Phillips screw.

Step 2 Back cover

The back cover is assembled and stuck to the plastic frame in the molds or holes designed for screws, but in this case it does not carry them.

Apply heat around the contour to soften those glue spots.

Apply heat to the contour of the screen to soften the glue. We suggest 2 alternations:

  1. Hot air gun: Emits a very hot air jet, use with caution at low power and short bursts.
  2. HOT GLASS: Bag filled with a gel of high thermal retention. Simply heat in the microwave and apply directly to the edges of the tablet (see instructions).

Step 3

Insert the tip of the tine into the joint between the back cover and the plastic frame.

Hold with the suction cup pulling slightly upward while tracing the contour with the tine.

Step 4

Observe in the first photo the disposition of the glue in a point, in one of the holes designed for screws. It has several like this in all the outline.

Disassemble the lid with the opening tool.

Step 5

Open the cover keeping in mind that it is still held by a flex cable to the base plate.

Remove the adhesive covering the connector on the plate.

Step 6

The connector is covered in glue. Use a precision cutter to cut the glue around the connector.

Step 7

Disconnect the flex cable from the motherboard and detach the back cover.

Step 8 3G Module

Remove the 3G expansion module. This is stuck to the back cover and held by 2 Phillips screws.

Video Tutorial summary

In this video you can watch a quick summary of the tutorial, but we recommend to follow the complete tutorial, with its explanations and detailed images.
Share this tutorial