Guide with all the necessary steps so that you can change the components of the Apple iPad mini 5 (A2133) yourself.


We apply heat to the screen, we introduce a fine tool that allows us to then introduce one or more plastic prongs to detach all the edges of the screen.


Remove the two Phillips screws (PH # 00) that hold the shield that covers the connectors on the screen and the battery.


We extract the four Phillips screws (PH # 00) that hold the wifi antenna, take it off and disconnect it.


Take off the adhesive that sits on top of the speaker connectors, and remove the five Phillips screws (PH # 00) that hold the speakers.


We unplug and remove the speakers.


We take off the adhesive, and extract the three Phillips screws (PH # 00) that hold the shield.


Remove the four Phillips screws (PH # 00) that hold the bluetooth antenna and take it off the motherboard.


We extract the two Phillips screws (PH # 00) that hold the module and take it off.
This step would not be necessary, we have done it for convenience when making the photographs of the guide.


We disconnect and take off the rear camera. We extract the two Phillips screws (PH # 00) that hold the side buttons and remove them. We also remove the keys to avoid losses.
This step would not be necessary, we have done it for convenience when making the photographs of the guide.


We extract the two Phillips screws (PH # 00) that hold the shield, disconnect and detach the flex with the audio connector.
This step would not be necessary, we have done it for convenience when making the photographs of the guide.


We disconnected the flex with the microphones and the front camera.


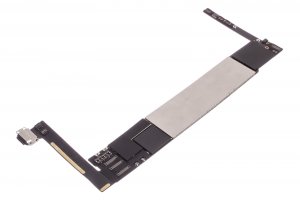
Remove the four Phillips screws (PH # 00) that hold the area of the charging connector, and with the help of a flat tool dipped in alcohol, we will gradually take off the base plate that we are going to replace. It is pretty well attached to the housing.


