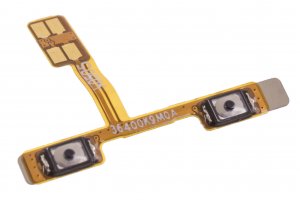
Xiaomi Mi 11 Lite - volume buttons

Guide with all the necessary steps so that you can change the components of the Xiaomi Mi 11 Lite (M2101K9AG) yourself.

Difficulty
1
2
3
4
5

Tutorial: Step by step

Step 1 Back case

To begin with, we must apply heat to the back cover in order to soften the adhesive that holds it, and with the help of one or more plastic spikes we will peel off all the edges of the case.

Step 2 Intermediate shell

We extract the eleven Phillips screws (PH # 00), which hold the intermediate casing that covers the motherboard area, and with the help of a flat tool we will unhook it.

Step 3 We disconnect battery

We disconnect the battery to work with greater safety.

Step 4 rear cameras

We removed all the rear cameras.

Step 5 Frontal camera

We also extract the front camera.

Step 6 rear flash

We disconnect and take off the rear flash.

It would not be necessary to remove the rear flash to remove the base plate.

Step 7 base plate

We disconnect all the components that are connected to the motherboard, and with the help of a flat tool we can now lift the motherboard, being careful not to damage the pins.

Step 8 card reader

We extract the card with the extraction tool, remove the four Phillips screws (PH # 00) that hold the reader area, and with the help of a flat tool we will remove it.

Step 9 Battery

To detach the battery we will first detach zone A from the sticker that it has, then zone B from the sticker, and to detach it we will pull from zone A, so that it detaches more easily we can introduce a few drops of isopropyl alcohol around the edges battery to soften the adhesive.
Step 10 volume buttons

We take off the rubber cover that covers the hole for the buttons, we take off the area of the contacts with the help of tweezers, and with a fine metal spike we take off the area of the buttons, and we can now install the new flex with volume buttons instead.

Video Tutorial summary

In this video you can watch a quick summary of the tutorial, but we recommend to follow the complete tutorial, with its explanations and detailed images.
Share this tutorial