Guide with all the necessary steps so that you can change the components of Ulefone Armor 6 yourself.


First of all we removed the tray of the cards.


Apply heat to the screen to soften the adhesive that holds it, and with the help of one or more plastic tines we will remove all the edges of the screen, extract the three Phillips screws (PH # 00) that hold the shield covering the connectors and we can now disconnect the screen.


We disconnect the battery, remove the 16 Phillips screws (PH # 00) that hold the intermediate housing, and using a tool that is thin enough to unhook.


We disconnected the interconnection flex from both ends to work with greater comfort.


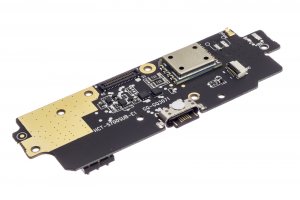
Disconnect and desoldamos the components that are connected to the auxiliary plate.


Remove the two Phillips screws (PH # 00) that hold the plate, lift it, and disconnect from the back the coaxial cable of the auxiliary plate that we have to replace.


