Guide with all the necessary steps so that you can change the components of the Samsung Galaxy S8 Plus (SM-G955F) yourself.


We apply heat to the back shell to soften the glue, and to be able to remove it we will help with a suction cup and a tine, when lifting the case we will have to disconnect the connector from the fingerprint reader.


Remove the 15 Phillips screws (PH # 00) that hold the intermediate housing and speaker module so that both the housing and the module can be removed.


We extract the tray with the extraction tool.


We disconnect the flex from the battery, and remove the front camera.


We remove the coaxial cable and the other flex cables that remain connected in the base plate to be able to remove it.


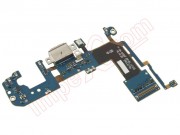
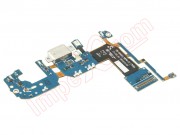
Remove the 5 Phillips screws (PH # 00) found on the auxiliary plate.


We remove the audio connector and disconnect the coaxial cable.


Take off and remove the auxiliary plate that we are going to replace.