Guide with all the necessary steps so that you can change the components of the Samsung Galaxy S21 Ultra 5G (SM-G998B) yourself.


To begin, we must apply heat to the back cover in order to soften the adhesive that holds it, and with the help of one or more plastic spikes we will take off all the edges of the case.


We disconnect the wireless charging coil, the NFC antenna, and we will remove the five Phillips screws (PH # 00) that hold the shield, and we can unhook the shield and take off the wireless charging coil.


We disconnect the battery to work with greater safety.


We disconnect the module with the autofocus laser, led flash and rear microphone, and we will also disconnect the headphone connector, we will remove the four Phillips screws (PH # 00) that hold the module, and with the help of a flat-tipped tool we will remove it .


We disconnect all the components that are connected to the motherboard.


We remove the Phillips screw (PH # 00) that we show in the first photograph of this step, and we will be able to lift the motherboard carefully.


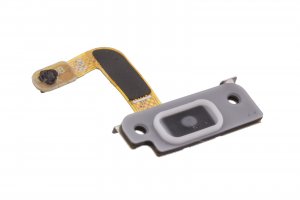
We remove the rubber cover of the first photograph, and the support of the second and third photograph, and with the help of a metal tool we have extracted it.


