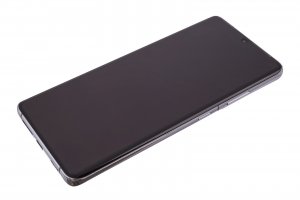
Samsung Galaxy S21 Ultra 5G - Full screen

Guide with all the necessary steps so that you can change the components of the Samsung Galaxy S21 Ultra 5G (SM-G998B) yourself.

Difficulty
1
2
3
4
5

Tutorial: Step by step

Step 1 Back case

To begin, we must apply heat to the back cover in order to soften the adhesive that holds it, and with the help of one or more plastic spikes we will take off all the edges of the case.

Step 2 Shield with NFC antenna and wireless charging coil

We disconnect the wireless charging coil, the NFC antenna, and we will remove the five Phillips screws (PH # 00) that hold the shield, and we can unhook the shield and take off the wireless charging coil.

Step 3 We disconnect the battery

We disconnect the battery to work with greater safety.

Step 4 Speaker module

We extract the four Phillips screws (PH # 00) that hold the module, and with the help of a flat tool we will remove the speaker module.

Step 5 Headphone and rear flash module

We disconnect the module with the autofocus laser, led flash and rear microphone, and we will also disconnect the headphone connector, we will remove the four Phillips screws (PH # 00) that hold the module, and with the help of a flat-tipped tool we will remove it .

Step 6 Components (edit)

We disconnect all the components that are connected to the motherboard.

Step 7 Motherboard with rear cameras

We remove the Phillips screw (PH # 00) that we show in the first photograph of this step, and we can lift the motherboard carefully.

Step 8 Power button

We remove the two plastic covers, and we can remove the flex with the power button.

Step 9 Vibrator

To detach the vibrator we will need a very fine tool and insert it underneath to detach it, we have used very fine flat tweezers.

Step 10 Frontal camera

We apply a little heat with a hot air gun to soften the adhesive that holds it, and with the help of tweezers we will extract the camera.

Step 11 GPS antenna

We extract the seven Triwing screws that fix the antenna to the housing, and with some tweezers we will remove it.

Step 12 Drums

We disconnect both interconnection flexes, and with the help of a suction cup and a tool we will make a slight lever to detach the battery.

Step 13 Full screen

We remove the tray with the help of an extraction tool, we extract the three Phillips screws (PH # 00) that hold the auxiliary plate, and with the help of a flat-tipped tool we will unhook the plate from the screen that we have to change.

Video Tutorial summary

In this video you can watch a quick summary of the tutorial, but we recommend to follow the complete tutorial, with its explanations and detailed images.
Share this tutorial