


We remove the tray from the SIM card.


We apply heat throughout the screen. Carefully introduce a barb on the side and perform the entire contour separating the screen of the intermediate casing.
The Samsung screen comes completely stuck. We must remove it in its entirety with extreme caution so that it does not break.
Once the screen is detached, we remove the flex plate from the flex and disconnect it.


Remove the Phillips screws (PH # 00) that hold the intermediate housing.
We remove the second SIM tray and tray from the micro SD
We remove the intermediate housing by prying.


We disconnect the flex from the battery of the motherboard.
With a syringe and very careful not to touch the base plate, we apply a little alcohol to help take off the battery.
Take off the battery carefully, adding, if necessary, more alcohol to soften the glue.


We disconnect the flex from the rear camera and remove it.
We disconnected the headphone jack jack and removed it.


Unscrew the two Phillips screws (PH # 00) from the base plate and remove it by prying it off.


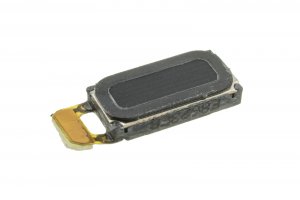
Carefully take off the headset of the back cover.