Guide with all the necessary steps so that you can change the components of the Samsung Galaxy A6 (SM-A600FN) yourself.


To start, with the help of an extraction tool we remove the trays from the phone.


We apply heat to the screen, and with the help of as many spikes as necessary we take off all the edges of the screen.
The LCD screen is also attached to the chassis in the central area.


Unhook the connector cover, disconnect the flex from the screen and we can remove the screen.


We extract the 18 Phillips screws (PH # 00) that hold the chassis to the back shell.


We disconnected the battery and the audio connector with microphone.


We extract the 2 Phillips screws (PH # 00) that hold the base plate to the chassis, and we can remove it.


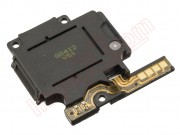
We extract the three Phillips screws (PH # 00) that hold the damaged speaker, and we can remove the speaker that we are going to change.