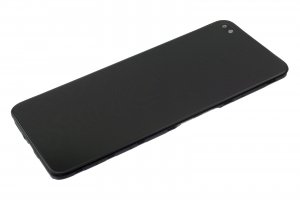
Realme X3 SuperZoom - Fullscreen

Guide with all the necessary steps so that you can change the components of the Realme X3 SuperZoom (RMX2086) yourself.

Difficulty
1
2
3
4
5

Tutorial: Step by step

Step 1 Tray

To start we will remove the card tray with the help of an extraction tool.

Step 2 We apply heat

We apply heat to the back case, and with the help of a fine tool we will open a small hole through which we will insert a plastic spike, and thus the case will be less likely to be damaged.

Step 3 Intermediate housing

We peel off the adhesive that joins the area of the speaker and the battery, and extract the nineteen Phillips screws (PH # 00) that hold the intermediate housing, and with the help of a pick we will unhook all the edges of the housing, but carefully do not cut the flex of the fingerprint reader.

Step 4 Fingerprint reader flex

Now we will disconnect the fingerprint reader to work with greater comfort.

Step 5 We disconnect the battery

We disconnect the battery to work with greater safety.

Step 6 Front cameras

We remove the adhesive that covers the connectors of the front cameras, and with the help of a flat tool we will disconnect them.

Step 7 Rear cameras

We disconnect and remove the four rear cameras.

Step 8 Base plate

We disconnect all the components that are connected to the motherboard, remove the Phillips screw (PH # 00) that holds the motherboard, and with the help of a tool we will lift the motherboard.

Step 9 Vibrator

We take off the vibrator with the help of a flat tool.

Step 10 Handset

We will also take off the headset.

Step 11 Speaker

We unhook the speaker with the help of a flat-tipped tool, being careful not to damage the components of the auxiliary plate.

Step 12 Flex bridge

We disconnect the interconnection flex.

Step 13 Drums

We take off the battery, for this we will use the green adhesive strip that it has.

Step 14 Auxiliary board

We disconnect the card reader connector, and the coaxial cable, and with the help of a flat tip opening tool we will lift the auxiliary plate.

Step 15 Adhesives and coaxial cable

We remove the adhesives and the coaxial cable.

Step 16 Charging connector

We take off the charging connector.

Step 17 Fullscreen

And to finish we only have to take off the card reader from the screen that we have to replace.

Video Tutorial summary

In this video you can watch a quick summary of the tutorial, but we recommend to follow the complete tutorial, with its explanations and detailed images.
Share this tutorial