Guide with all the necessary steps so that you can change the Nubia M2 Lite components (NX573J) yourself.


To begin we must remove the tray of cards.


We extract the 2 Torx screws (T4) and with the help of a metal tine we uncouple the housing.


Remove the 3 Phillips screws (PH # 00) that hold the shield, disconnect the audio connector and remove it.


Desoldamos the vibrator.


We disconnect all the components that are connected to the auxiliary plate, remove the 2 Phillips screws (PH # 00) that hold it and we can remove it.


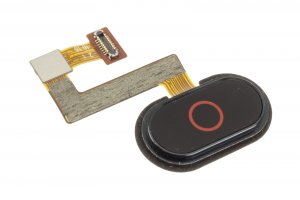
Remove the 2 Phillips screws (PH # 00) that hold the shield, take off the flex with front leds and we can remove the flex with front button.


