Guide with all the necessary steps so that you can change the components of the LG Q6 + (M700n) yourself.


To begin we will apply a little heat to the back cover to soften the adhesive that holds it, and helping us with a thin metal spike we will make some egg to introduce a plastic to go unpinning all the edges of the casing.


We extract the eleven Phillips screws (PH # 00) that hold the antenna module with loudspeaker and the intermediate housing, and with the help of a flat tool we will disengage both parts.


We disconnected the battery to avoid possible damage.


We removed the front camera.


We disconnect all the components that are connected to the motherboard, and remove the tray from the cards.


We take off the battery.


We take off the audio connector.


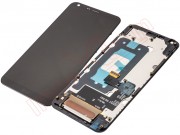
Remove the four Phillips screws (PH # 00) that hold the screen to the chassis of the phone, and with the help of one or more tines we will separate the chassis and the screen that we are going to replace.