Guides with all the steps to change the microphone of the Karbonn Smart A5s yourself.


We will start as always opening the case. There are telephones that do not seem made to be repaired and in this it is noticeable from the first step!
To open the housing we will use an opening tool, moving it around the contour and making lever movements if necessary.


We will proceed to remove the battery. Using an opening tool we will leverage to remove it.


Once we have the case and battery out, we proceed to locate and remove the screws.
As we can see in the photographs, one of the screws is hidden behind a sticker.


Now we can remove the intermediate casing. As always we will use an opening tool, to avoid unnecessary damage, moving it around the edge of the frame.


We remove the adhesive that is stuck to the metal chassis that covers the flex of the lower plate.
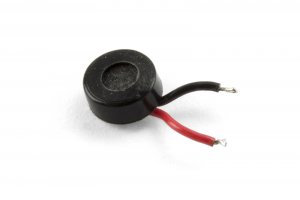
We also disengage the microphone from the frame and we can remove the touch screen. (Do not confuse with display).


We remove the adhesive that is stuck to the metal chassis that covers the flex of the lower plate.
We also disengage the microphone from the frame and we can remove the touch screen. (Do not confuse with display).


We only have to desolder the microphone to remove it.


