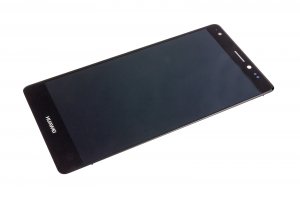
Huawei Mate S - screen

Guide with all the steps necessary for you to change the screen of the Huawei Mate S (CRR-L09) yourself.
Difficulty
1
2
3
4
5

Tutorial: Step by step

Step 1 Huawei Mate S

Huawei Mate S

Dimensions : 75.3 x 149.8 x 7.2 mm

Weight 156 g
SoC : Huawei HiSilicon KIRIN 935
Processor : 4x 2.2 GHz ARM Cortex-A53, 4x 1.5 GHz ARM Cortex-A53, Number of cores 8
Graphic processor : ARM Mali-T628 MP4, Number of cores: 4
RAM memory: 3 GB
Internal memory: 32 GB, 64 GB, 128 GB
Memory cards: microSD, microSDHC, microSDXC
Display : 5.5 in, AMOLED, 1080 x 1920 pixels, 24 bit
Battery : 2700 mAh, Li-Polymer (lithium-ion polymer)
Operating system : Android 5.1.1 Lollipop
Camera : 4160 x 3120 pixels, 1920 x 1080 pixels, 30 fps
SIM card: Nano-SIM
Wi-Fi: b, g, n, Wi-Fi Hotspot
USB : 2.0, Micro USB
Bluetooth : 4.0
Location / Navigation : GPS, A-GPS, GLONASS

Before starting, make sure that the mobile is turned off.

Step 2 SIM and SD cards

Remove the SIM and SD cards with the removal tool.

Step 3 Back case

Remove the 2 Torx T-2 screws securing the housing.

Step 4

Separate the back cover with a plastic opening tool, to avoid damage.

Be careful with the flex fingerprints since it is still connected to the motherboard.

Step 5

Unplug the flex from the fingerprint reader on the motherboard to separate the housing.

Step 6 Motherboard

Remove the 2 PH00 Phillips screws that hold the cover of the plate connectors.

One of the screws is covered by a white warranty seal.

Step 7 Flex interconnection

Unplug the flex that connects the motherboard with the auxiliary.

Step 8 Baseboard connectors

Disconnect the flexes from the motherboard: battery, display, push buttons.

Disconnect the upper end of the coaxial cable.

Step 9 Motherboard

Remove the 4 Phillips PH00 screws securing the motherboard.

Detach the chassis plate by gently prying it off.

Step 10 Battery

The battery is attached to the chassis by two strips of adhesive. Pull the piece of tape laterally to remove the adhesive.

Step 11

Once the adhesive strips are removed, you can separate the battery.

Step 12 screen

The screen is attached to the chassis by a strip of adhesive that runs all the way around. To detach it we will apply heat to soften the adhesive and to peel off easily.
In this guide we use a thermal mat, which we will adjust between 80 and 100 ºC. Warm the surface of the screen at this temperature for about 40 seconds.
While holding the screen with a suction cup, insert a prong or other opening tool between the glass and the frame.
Step around the contour with the quill bit by bit to release the adhesive.

Step 13

Continue until the entire contour of the screen comes off. If necessary, apply heat again.

Video Tutorial summary

In this video you can watch a quick summary of the tutorial, but we recommend to follow the complete tutorial, with its explanations and detailed images.
Share this tutorial