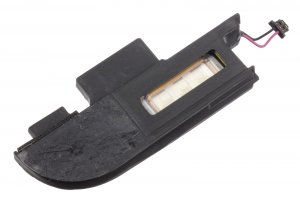
HTC One Mini 2 - Speaker module

Guide with all the steps necessary for you to change the HTC One Mini 2 speaker module yourself.

Difficulty
1
2
3
4
5

Tutorial: Step by step

Step 1 HTC One mini 2

Características:
 
Dimensiones: 137.4 x 65 x 10.6 mm.
Peso: 137 g.
Pantalla: Super LCD2 capacitive touchscreen 1280x720, 4,5".
Memoria: Interna 16GB, 1GB RAM. MicroSD hasta 128GB.
Procesador: Quad-core 1.2 GHz Cortex-A7, Adreno 305.
Cámara delantera: 5MP, video 1080p@30fps.
Cámara trasera: 13 MP, 4128 x 3096 pixels, autofocus, video 1080p@30fps, 720p@60fps.
Batería: Li-Po 2110 mAh no extraible.
Sistema operativo: Android 4.4.2 KitKat.

Step 2 Embellisher upper

In order to remove the back cover of the phone, first we will have to remove the top cover, since behind it there is a screw that holds this case.

We will heat a little to soften the glue, with care since we could damage it.

In the last photo we can see that behind the embellisher also hides an antenna flex. We will avoid as far as possible the areas where this flex is, if necessary we will slide the barb on the side of the screen.

Step 3 SIM and microSD cards

We will use the tray extraction tool. Inserting this through the hole, the tray will be ejected.

Step 4 Back case

First we will remove the screw that was hidden behind the upper trim. Then we will disengage the case by prying it with an opening tool.

Step 5 Back case

Before removing the case completely we will have to take off the rear camera that is attached to it.

Once removed, we will remove the adhesives from the connectors of the central plate.

Step 6 Disconnect flex cables

In this step we lift the fastening tabs of the connectors on the base plate to later remove the flex cables.

Step 7 Disconnect flex cables

After lifting the clamping tabs we can disconnect the flex cables.

Step 8 Disconnect central plate components

To disconnect the battery, first remove the adhesive covering the flex cable. We remove the two Phillips screws (PH # 0) that hold the connector to the plate and we can unplug it. Now we can disconnect the coaxial cable from the central plate.

We will also disconnect the vibrator cable.

Step 9 Disconnect components

Now we disconnect the coaxial cables that connect the central plate with the upper plate and now we only have to remove the four Torx screws (T5).

Step 10 Remove central plate

We remove the last adhesive that holds the central plate and we can remove it.

Step 11

Finally we will disconnect the loudspeaker from the bottom plate and we will disengage it to be able to remove it.

Video Tutorial summary

In this video you can watch a quick summary of the tutorial, but we recommend to follow the complete tutorial, with its explanations and detailed images.
Share this tutorial