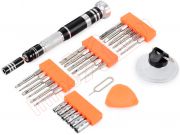
Guide with all the steps necessary to change the motherboard of Google Pixel yourself.


We heat the screen at about 60 ° C for about a minute to soften the adhesive.
We introduce an opening tool between the frame and the screen and slide it around the contour.


We remove the two Torx T5 screws that hold the shield of the screen connector and then disconnect it.


We remove the nine Torx T5 screws from the intermediate housing and unhook it by levering the notches that hold it.
Before removing it, we will disconnect the flex from the proximity sensor.


In this step, we disconnected the interconnection flex, the battery, the flex of side buttons, the audio connector, and the front camera to be able to remove the motherboard.


Disconnect the coaxial cables and remove the two T5 Torx screws that hold the plate.
Before removing it, we will have to disconnect the flex from the fingerprint reader.